How to Start Mountaineering in 6 Simple Steps
06/2024

According to UNESCO, mountaineering or alpinism is “the art of climbing up summits and walls, [which] involves physical, technical and intellectual abilities”. While it may sound pretty straightforward on paper, mountaineering is in fact one of the most challenging and demanding sports out there. In-depth knowledge of the terrain, climbing skills, resistance to cold and endurance are just some of the requirements it takes to make it all the way to the top. Here, we’ll tell you what comes with being a full-blooded alpinist, including 6 tips to help you build up the physical fitness and technical know-how you need to conquer your first summit.
Let’s be clear about one thing: It’s not actually that easy to sum up mountaineering in just one word, because the sporting activities associated with it can range from ski tours to rock climbing and ice climbing all the way to expeditions. But there is one obvious connecting factor: reaching the summit. As with every new adventure, the first step is always the hardest. To make getting started as easy as possible, we’ve put together this handy guide.
1. Build up your fitness levels
Before you can begin to even think about those snow-covered ridges, you physically need to be in tip-top shape. A great starting point to build up fitness are short hikes in hilly terrain, which will not only give you a first taste of the real thing, but also help you familiarize yourself with navigating the great outdoors. Gradually increase the difficulty level of your treks, fill up your mountaineering backpack with more and more equipment and weights, and cover longer distances. While hiking is a great way to prepare for mountaineering, you should also incorporate other training methods to achieve the required fitness levels:
45 to 90 minute cardio workouts will help you build up the necessary stamina for your next alpinism tour. Whether your chosen activity is running, swimming or cycling is entirely up to you – just make sure to train two to three times a week, and allow for rest days in between.
HIIT or High Intensity Interval Training will help your body to maximize the oxygen intake with every breath you take – which is vital when you’re moving at often dizzying heights.
To be able to carry heavy backpacks and equipment, you need to build up strength. Squats and deadlifts will help you strengthen your quads and core muscles, which will take most of the heat when you’re on an alpine tour.
Stretching exercises and yoga help improve agility, and will give your body the chance to recover after grueling training days. Plus, the breathing exercises commonly found in yoga are a great way to prepare yourself for controlled and efficient breathing when the air up there is getting thinner.
2. Learn how to climb
There are a number of summits around the world that you can get to without being an expert climber. To have the climbing basics down, however, is a definite must. Make sure you know how to use ropes and belay devices , how to tie different knots and correctly put on a climbing harness – once you’ve found the perfect size and fit of your climbing harness, of course. The good news: Chances are you’ll find an indoor climbing area somewhere nearby where you can learn and practice your skills. Simply book yourself onto a beginner’s course and absorb every bit of information you’re given.
Once you’ve got the basics down, it’s time to sign up for courses designed to help you transition from the indoors to the outdoors. These courses will teach you how to set up a stand, how to master multi-pitch climbing, abseiling, and how to safely navigate even tricky terrain. Also, don’t forget to buy a helmet before you switch from indoor to actual wall climbing. It’s best to start with easy routes, preferably in the summer or in dry weather conditions, and then work your way up until you’re comfortable navigating wintery conditions.
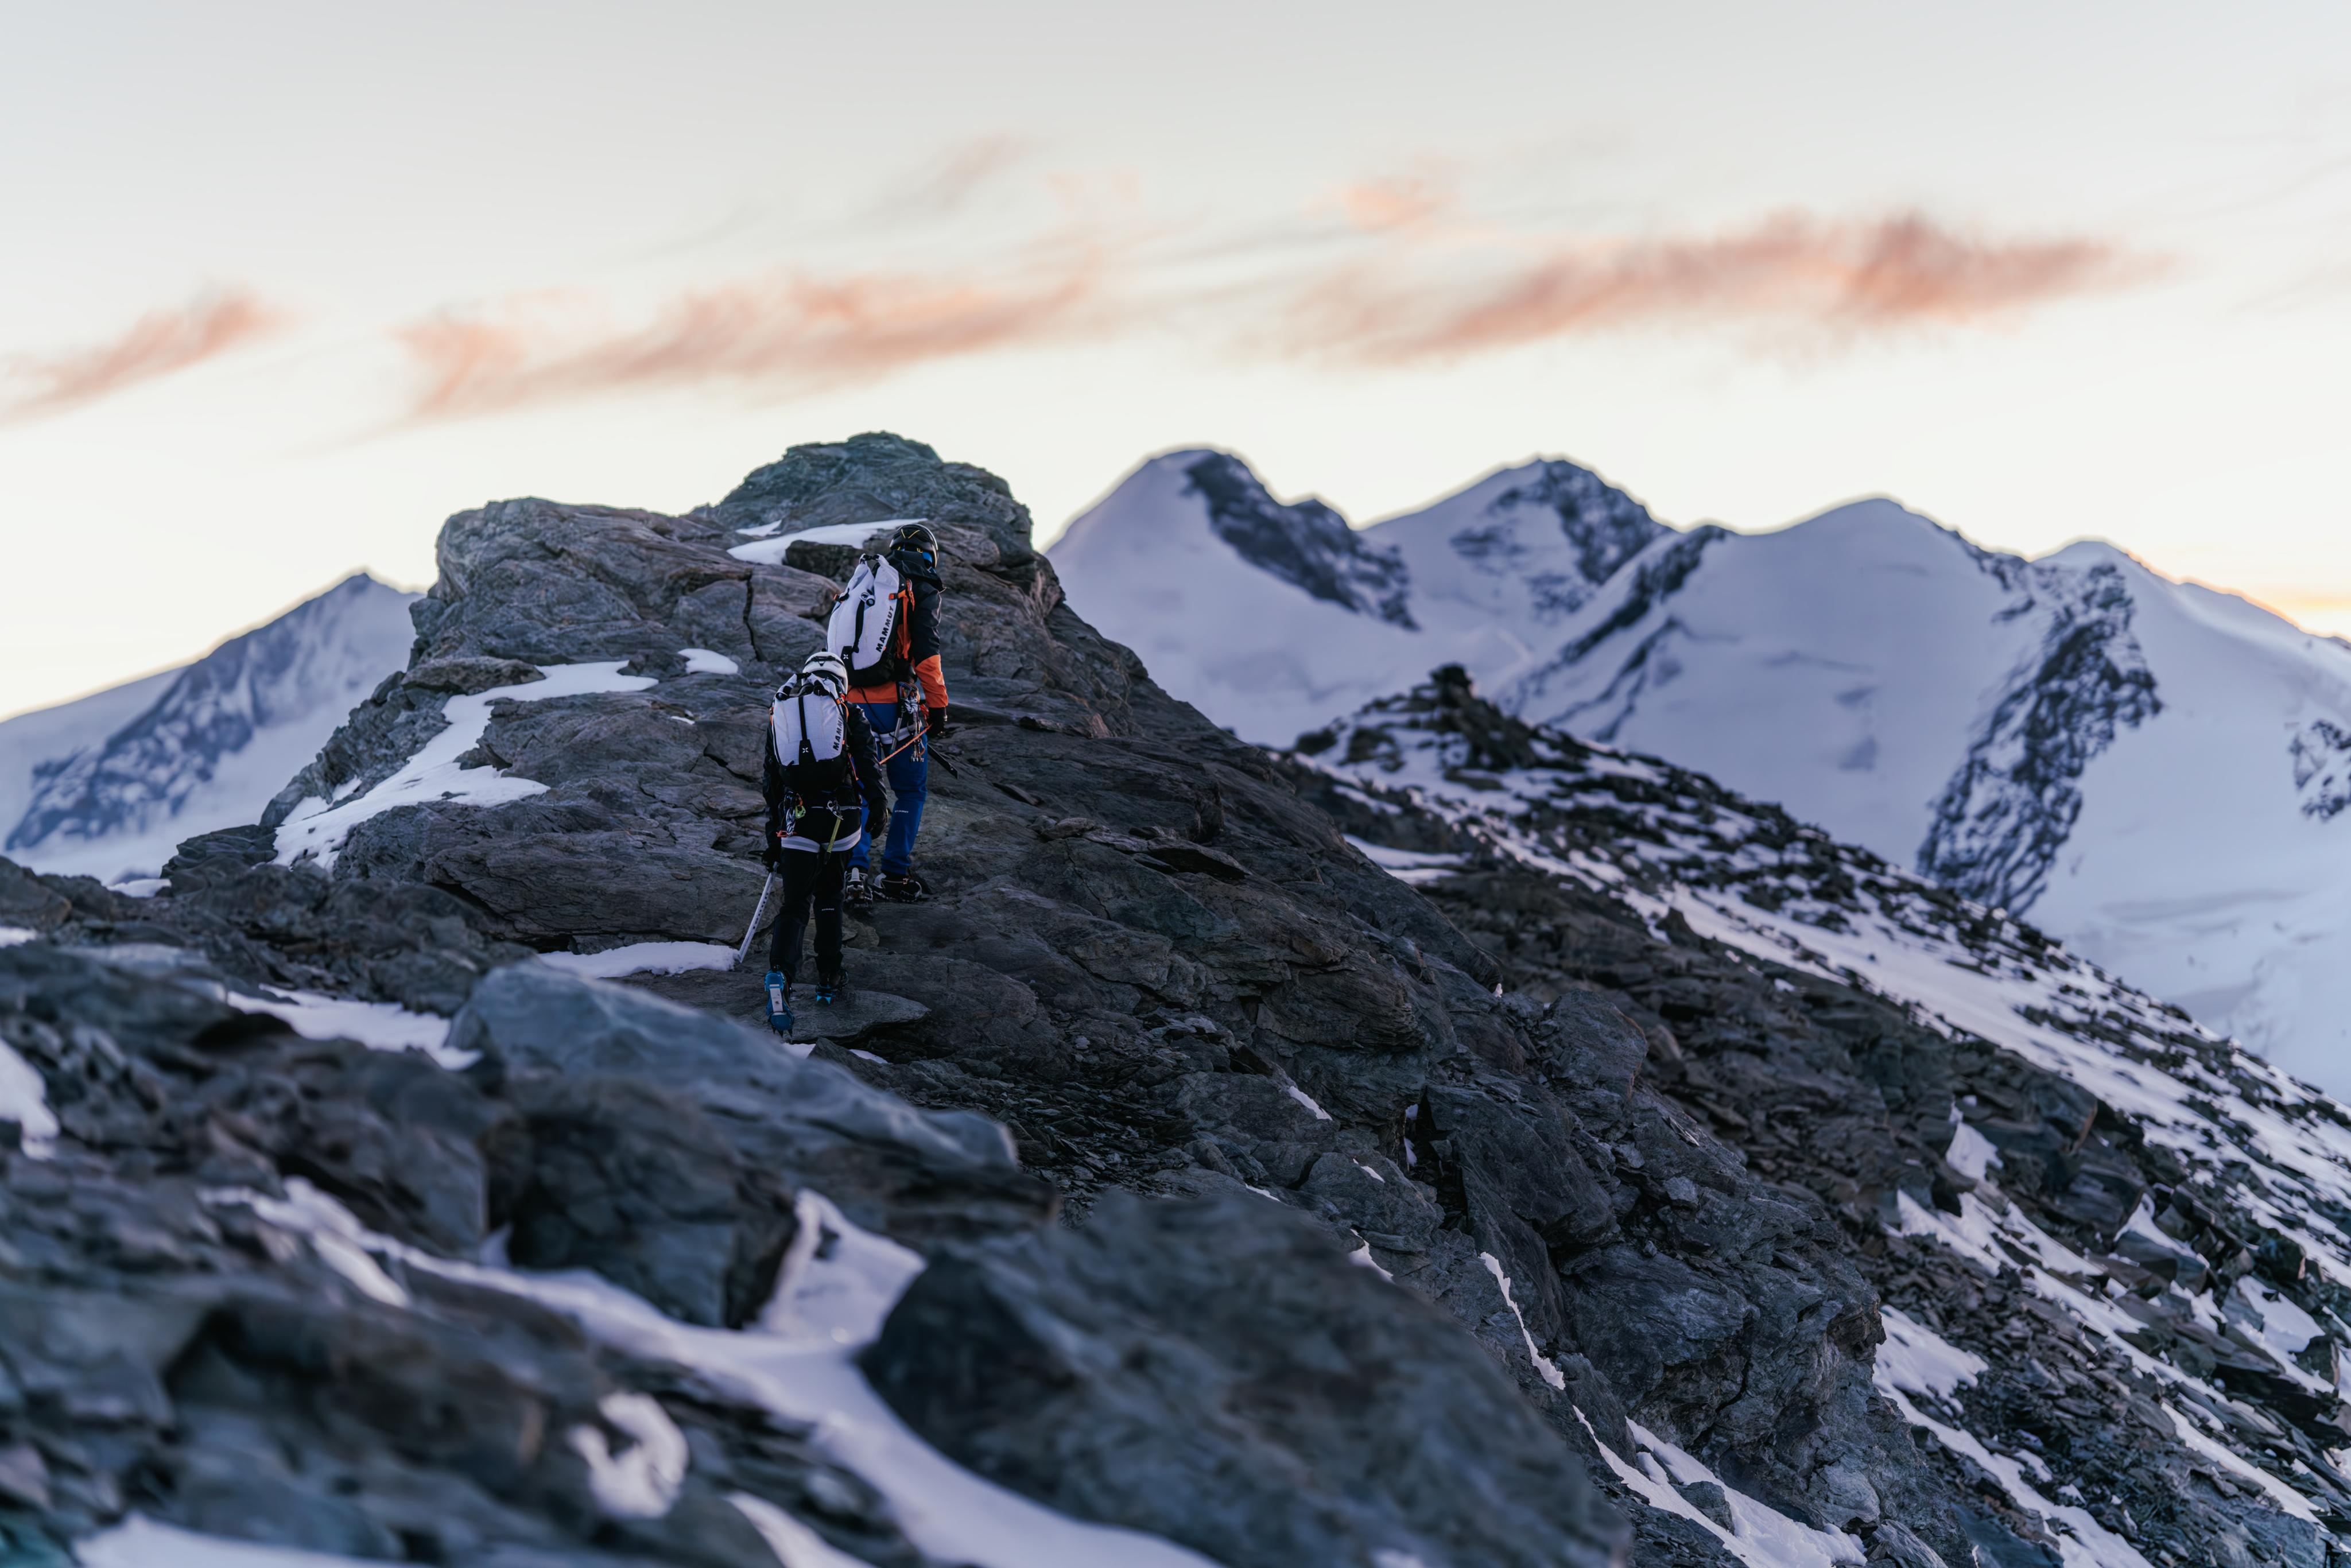
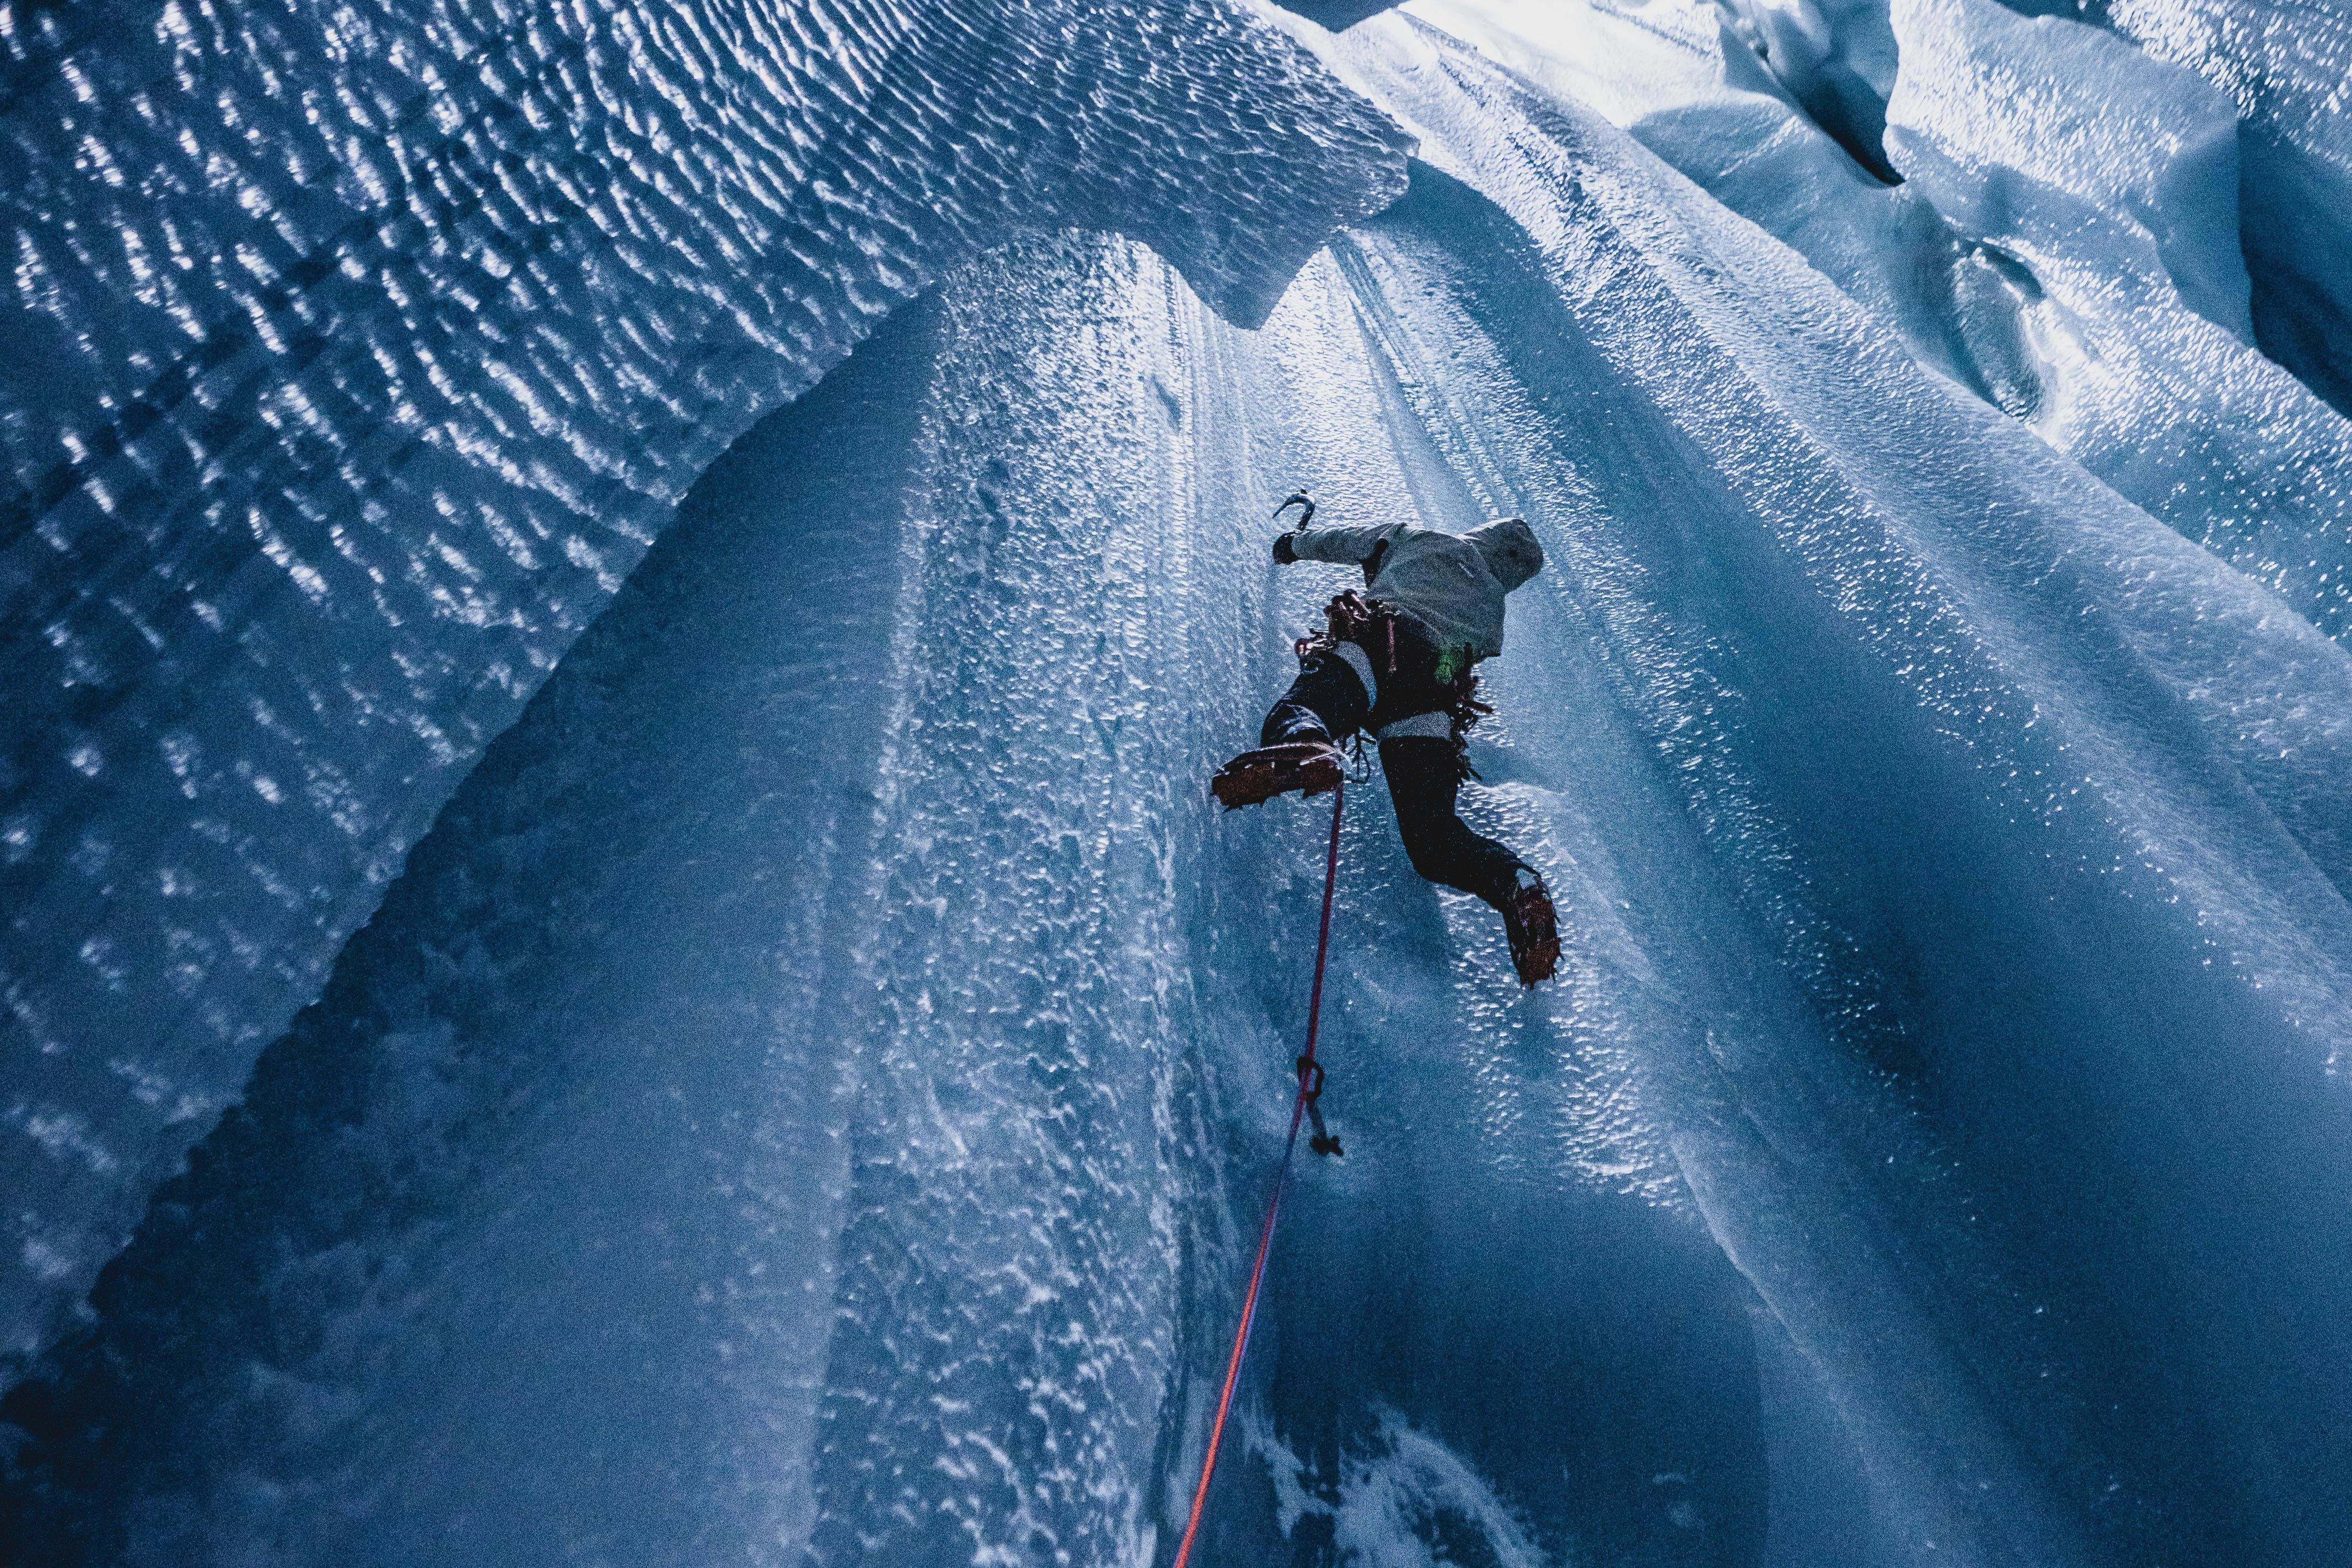
To prepare for climbing that tempting 4000 m summit, you can sign on to an alpinism course to learn the basics of navigating ice and snow, e.g. how to walk on long and short ropes, how to put on crampons, how to use an ice ax correctly, and how to carry out a crevasse rescue.
3. Get equipped
You’ve probably already taken care of getting your own climbing equipment – good job, because you’ll need it for mountaineering. On top of that, you should also take a look at our backpacking gear checklist, because even when climbing the most daring summits, you’ll often have to hike over long stretches of easy-to-navigate terrain. Once you’ve left that behind, however, it’s only a matter of time before you’ll be confronted with steep walls and ice-covered mountainsides . In order to conquer these passages, you’ll need specialized gear.
Get a proper foothold – with mountaineering boots
The most important thing to invest in are mountaineering boots , as they allow you to feel even the smallest differences in terrain at every step. The high shaft extends above the ankle, giving you all the stability you need in mountainous surroundings. All Mammut shoes are fitted with a protective rubber edge where the sole connects to the upper material. Compared to hiking shoes , mountaineering boots are stiffer, meaning it’s almost impossible to bend the sole between the toe and heel. The high level of stiffness enables you to use crampons to climb icy surfaces. To start, shoes that fulfill the bare minimum requirement for use with crampons are ideal. They will give you enough flexibility in the sole area when hiking, while also being suitable for use with semi-automatic crampons.


Other basics you need for mountaineering
If you’re new to mountaineering, the choice of gear available can quickly make our head spin. To help you get started, we’ve put together a list of the most important items of basic equipment:
An ice ax, ideally with a straight or slightly angled shaft with a length of 60 cm.
Crampons with 10 or 12 spikes, ideally with a combination or semi-automatic binding that is fully compatible with your mountaineering boots.
A lightweight EPP foam (expanded polypropylene) climbing helmet , just like our Mammut Wall Rider, which provides ultimate wearing comfort even on long alpine tours.
Robust and waterproof gaiters to keep your feet dry and warm.
Water-repellent gloves with a leather reinforced palm to ensure the best possible grip when using an ice ax.
Slings and carabiners for belaying, transporting equipment, crevasse rescues and building a stand.
When starting from scratch, you should always take the time to try out as much different equipment as possible by simply renting what you need. Many mountaineering hotspots and alpinism schools offer a rental service – you might even meet advanced alpine climbers there who’ll be able to give you helpful recommendations.
Clothing for mountaineering
Mountaineering will stretch your wardrobe to a whole new limit: Chances are you’ll kick things off with a pleasant hiking trail at T-shirt compatible temperatures, work your way up meter by meter until you find yourself standing on a glacier at double-digit subzero temperatures. To effectively control your body temperature every step of the way, layers from top to bottom are your best friends:
A high-performance base layer to wick away moisture from your body.
Midlayers like a softshell or fleece jacket create a warming cushion of air and keep your body from going hypothermic.
A warming layer consisting of an insulated jacket or down jacket creates a warming cushion of air between your body and your surroundings.
Outer layers to shield you from the elements: A waterproof hardshell jacket will protect you against the wind, rain, and cold.
To keep out the biting cold mountain air even better, make sure to complete your outfit with accessories like a beanie , headband or neckwarmers .
Mountaineering backpack
Once you’ve put together all your gear, you’ll also need a way of transporting it. We recommend a sturdy all-weather mountaineering backpack with special fittings that allow you to securely attach your rope(s) and ice ax. Backpacks with a volume of 30-50 liters are particularly versatile – the perfect choice for anything from a day tour to a weekend tour, and even wintery tours over up to three days. If you’ve mastered the art of packing and are able to keep your gear down to the bare minimum, 50 liters can even take you through a 5-day hiking extravaganza in the summertime. Another must-have, particularly in wet, ever-changing weather conditions: a drybag to keep clothes and delicate items in your backpack dry.
4. Sign up to a course
There’s one essential thing you can’t simply order online: in-depth knowledge of all the technical aspects of mountaineering. While books are a great way to familiarize yourself with the basics, nothing can replace a training course led by full-blooded professionals. You can usually sign up for these courses at indoor climbing halls or alpine sports clubs, ranging from short intensive courses over one or several days to training courses lasting several months. Amongst many other things, they will teach you how to properly secure yourself when ice climbing, what to do in case of an avalanche, and how to plan environmentally friendly tours. Sometimes, courses may also include a number of practice alpine tours, giving you the chance to gain valuable practical experience in a safe environment. Whichever option you choose, make sure the following skills are covered:
Moving in the snow can take many different forms, from hacking steps into the snow to completely immersing your foot for a controlled downhill slide.
Crampons ensure a firm hold on icy surfaces – using them, however, takes practice. It’s also important to know what type of terrain is most suitable for putting them on and taking them off.
An ice ax will only work to its full potential when used correctly. Any course you take should tell you exactly how to use an ice ax for climbing and stopping a fall.
Climbing in a roped party is a key safety measure – every alpine climber needs to know the ins and outs.
In a perfect world, you’ll never be involved in a crevasse rescue, i.e. rescuing one member of the party who has fallen into an ice crevice. However, you still need to know the exact logistics of it all.
Obviously there’s no limit to knowledge, so don’t be afraid to look beyond the obvious and get acquainted with as many outdoor skills as possible, from first aid to navigation or camping in the wild. Just because you’re determined to become a climbing pro doesn’t mean you have to stick to courses exclusively related to mountaineering.

5. Set a goal
Mountaineering requires extensive preparation – there’s a good chance you’ll occasionally hit a motivational stumbling block in between training, climbing and hiking. The most effective way to combat this? Plan your first climb in great detail to make sure you don’t lose sight of your goal. Start with a small, approachable mountain that can be easily scaled using basic climbing techniques. When planning your route, you might want to consider these helpful tips:
Use websites of tourism boards or local alpinism organizations to get all the information you need on difficulty level, distance, elevation difference, characteristics of the route, water supplies that can be found along the way, as well as taking a closer look at the distinct features of the terrain.
Talk to someone who knows the terrain well. Locals, other alpinists and alpine guides can give you valuable information, as well as insider tips and advice.
Find out what skills you need to navigate your chosen route. Can you easily reach the summit via hiking trails, will you have to climb icy inclines or perhaps even steep walls? Always make sure you pick a route that is suitable for your skill level – and never ever overestimate your abilities.
Find out if you need to obtain any specific permits. Some regions require mountaineers to register – this is usually done in an attempt to limit the number of people coming in, and to protect the environment.
Once you have gathered all the relevant information you should have a much better idea about how long the climb is going to take. Make sure to add a bit of extra time on top, just in case your progress is slower than expected.
The highest summits may seem the most exciting when starting out – they may even be the reason that got you into mountaineering in the first place. However, you should definitely start with a smaller mountain somewhere in your vicinity or in a region that is well known for its tourist-friendly set-up. The terrain will have plenty of obstacles in store for you, so don’t forget to pack your map and a Plan B.
6. Find your pack
There’s a reason why mountaineering is a team sport: Rock climbing in particular is best done in pairs – ideally, a roped party consists of three to five people. While it’s possible to go solo, beginners especially are better off starting out in a group, which means extra safety in risky situations for everyone involved, particularly when it comes to belaying. That being said, there are many more reasons why mountaineering only reveals its full potential in a group setting:
Knowledge is power, and shared knowledge is especially powerful. If you join a group of people with different areas of expertise, like climbing, bivouacking or navigating, you’ll be able to ace even challenging alpine tours.
Just like knowledge, equipment can be shared, too. On long tours, your back will thank you for not having to lug around every single piece of equipment yourself. There is plenty of hiking gear you only need one of when out and about as a group, meaning you can distribute the weight evenly across several pairs of shoulders.
What’s the point in conquering the summit when there’s no one there to share your glorious moment with? On top of that, mountaineering is generally a lot more fun in a group setting, and the perfect breeding ground for new friendships.
You’re most likely to find like-minded people in mountaineering and climbing courses (which should be on your to-do list anyway), or by becoming a member of your local alpine sports club if you happen to live in – or close to – the mountains. If you’re currently residing in the flatter parts of the country, you can try to find equally motivated climbers and alpinists in online chatrooms or on social media.
Start your adventure
Now that you know the six steps to get a first foothold in the world of mountaineering, it’s time to take the next step and embark on your own adventure. Put on those hiking boots , start training, and acquire additional knowledge and know-how – be it through books, courses or our dedicated Stories & Guide . And most importantly: Don’t forget to have fun while you’re getting to know the fascinating world of mountaineering.
Explore Mammut Technologies
We are inventors, developers and pioneers. We take big, exciting ideas and turn them into reality, pushing quality and performance up to a whole new level. And we’ve been doing it since 1862. Find out more about our latest technologies.